Initial Inspection

If your Schmidt has been extensively handled or subjected to wide variations in temperature and humidity in an observatory, or is experiencing focus problems, you might consider removing the rear cover of the camera for a mirror inspection before you attempt further servicing or focusing. An inspection with the back cover off will reveal whether the mirror needs to be completely removed for realuminizing. ound that my own camera's mirror had not aged well. The aluminizing was so thin that I could see through it and the coating was heavily pin holed. Shining a light in from the rear of the camera and viewing into the tube from the corrector plate end revealed a scene that looked like a tin roof punctured by blasts of buckshot.

Removing the camera's back cover and shining a light in from the rear will reveal the condition of the mirror. In this case, the author's camera shows the results of 25 years exposure to everything from high humidity to ants that crawled into the camera durring an extended cloudy period, then died on the mirror.

After speaking with several different Schmidt camera owners, it is apparent that there are several ways the primary mirror can be installed in the camera, depending upon when Celestron built it or if it is an Epoch made or modified the camera. In all cases, removing the rear cover from the Schmidt camera allows access to the mirror. One thing immediately obvious when the cover is removed is that the mirror in a Schmidt camera is made from the same blanks used for Celestron's Schmidt-Cassegrain telescopes. There is an indentation cast into the center rear of the mirror where the Cassegrain hole would have been bored out if the blank were destined for an SCT.

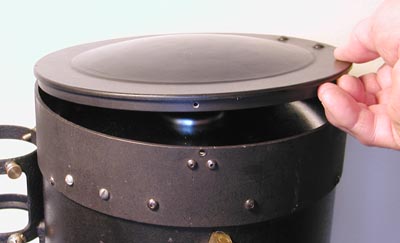
Removing the rearmost three screws from the tube allows the back cover to be released.

Before removing the cover, place the camera corrector plate down on a clean flat surface so the rear of the camera is straight up. This step is important as in some cases the mirror is held in place by three 1-inch long, half-inch wide springs that are in turn held in place by the rear cover. This cast aluminum cover is bolted in place by the rearmost screws in the three triangular patterns of screws on the rear of the tube assembly. (The two forward screws in each triangle may hold collimation adjusters, depending upon who built the camera, so leave them tight for now.) If the camera has the spring mount option, the cover will noticeably try to push up as the first screw is removed. Force the cover back down while removing the remaining two screws or their threads may be damaged. If there are no springs, the cover is a loose press fit into the rear of the tube assembly and inserts about a half inch into the tube. A knife blade or small pocket screwdriver blade may be needed to pry it loose.

If the mirror coating is in good shape, verify that the glass is still solidly mounted in its cell and does not rattle or display any side-to-side or fore-and-aft play. The glass is usually held in place with pads of RTV silicone. Once this is done, examine the Invar rods holding the spider assembly, and the spider itself. Look for loose components that can be rattled or moved at all. Pay close attention to the lock nuts which hold the spider to the on-axis Invar rods, and the nuts which laterally hold the spider and film holder magnetic fixture. If the lateral nuts are tight and your camera is currently in focus, dab a spot of epoxy on them to keep them tight. If the mirror, Invar rods, and spider assembly pass inspection you can proceed with collimation and focusing tests. If the mirror needs to be removed, skip down to the mirror removal section.

Go to the previous page ---- Collimating and Focusing a Schmidt Camera
Go to the next page -------- Checking Corrector Plate Position