Miscellaneous Schmidt Notes

When it came from the factory, the film holder often still needed deburring to remove tiny machining splinters that scratched the film. If your film holder still scratches the film, do not try to polish the pressure plate itself. Remove the pressure plate screw and slip the pressure plate out of the film holder before polishing the holder frame. Mark the back of the pressure plate so it will be reinstalled in the same direction that it was removed. Use fine emery cloth to lightly polish all areas on the film holder frame that contact the film. Thoroughly wash the plate holder to remove sanding debris and let it dry completely before using it. If you have several film holders, and especially if you have both filter and non-filter film holders, de-burr only one at a time so their components are not accidentally mixed up. That would result in permanently out of focus images.


The film holder is loaded in a photographic changing bag. To make it easier to handle, a large cardboard box or square plastic bucket can be slipped inside the changing bag to allow plenty of room without the bag collapsing onto your work.


When loading single exposure film chips into the plate holder, wrap a small piece of paper around the film when it is slid into the plate holder. This will protect the emulsion from scratches during insertion. Once the film is in place, withdraw the paper and tighten the pressure plate lock screw to secure the film. Use scissors to trim the excess film extending out both sides of the plate holder.

The loading sequence is: remove the plate holder cap, loosen the pressure plate lock screw until the pressure plate is loose enough to easily slide the film into the plate holder, slide the film in while protecting it with a paper sleeve, withdraw the paper, tighten the pressure plate lock screw, and replace the cap. Use finger pressure only to tighten the pressure plate lock screws. Using a wrench to tighten it can actually push the film ahead of the focus point.


The best advice for handling and installing the filter holders used with the 35 mm film holders is patience and a light touch. The filter holder itself is a thin metal ring, onto which a circle of Wratten filter material is glued. To cut the filter material, trace the circle of the filter holder on a piece of plain white paper. Fold the paper in half and place the Wratten filter between the sheets. Cut out the traced circle while handling the filter by the paper sandwich. Gluing the thin filter material to the small ring can be a challenge. It is easiest to use the point of a needle to dab spots of Superglue or rubber cement to the rim of the filter holder, then place the filter on the glue.

Installing the filter holder on the film holder necessarily has to be done in total darkness through the film-loading door after the film has been placed in the camera. Handle the filter by its metal rim and slip it over the film holder until it wedges in place. Give it a gentle tug to make sure it is seated before closing the film-loading door.


When using the factory roll film adapter with the film holder, make sure the unit is not slightly tipped in relation to the film holder. If it is cocked, it will hold one side of the film holder off the mounting magnet at the camera's focal plane and ruin the focus.


The easiest way to handle and store the individual film chips produced by a Schmidt camera is to mount them in 35 mm slide mounts. This not only simplifies storage, but also allows recording important photo data on the slide mount itself.


Although the manufacturer never said it, some film holders are unidirectional in the camera. They only focus when installed in one direction. Rotate them 90 or 180 degrees on the magnet and they go soft on focus. I don't think this is on purpose, but a manufacturing accident that they didn't bother to fix considering the relatively low price of the camera (for what it is). To see if your film holder is unidirectional, take a series of short exposures while rotating the holder to all four orientations, and then carefully compare the focus of each image.


If you continue to have focus problems, make sure you don't have a filter film holder masquerading as a white light holder. The filter film holders have a machine screw washer loose on the pressure plate tensioning screw. But if someone has previously dismantled the film holder, the washer may be gone, or even installed on the white light holder if you have both.


If you are at your wits end trying to focus a used Schmidt camera and nothing seems to help, consider the possibility that someone may have inverted the corrector plate. Turn the corrector around and see if your problems start to solve themselves.


Filter film holders are machined to achieve focus at a point slightly different than film holders designed for white light. This is to compensate for the slight focus shift caused by the Wratten filter material. If for some reason a filter film holder needs to be used without the filter, the camera either needs to be refocused for that film holder, or the film holder shimmed into the proper focus point. Since the first option is tedious and time consuming, a little arithmetic will give us a starting point for determining how much to shim the film holder. The distance the holder needs to extended toward the mirror to compensate for the missing filter is (N-1)*t, where N is the index of refraction of the filter (1.33 for a Wratten gelatin filter) and t is the filter thickness (.004-inch). Therefore, a starting point to focus a filter film holder without the filter by putting a .0015" spacer between holder and magnetic clamp. Such a spacer can be scavenged from an auto mechanic's feeler gauge set that can be purchased at any auto parts store.


If the tube assembly of the Schmidt camera needs to repainted, either to restore the interior reflection deadening flat black finish, or the exterior to restore the camera's appearance, Krylon makes two excellent paints in spray cans. For the interior, they have "Ultra Flat Black" which is about as dead black as you can find. For the exterior, they have "Semi-Flat Black" which has a satin type sheen, but is not glossy and is cleanable. Of course, you could consider a color other than factory black for the exterior. A white tube assembly would be desirable because it can be seen in the dark and reflect heat in the daytime. On the other hand… a fire engine red Schmidt camera would be exciting!


If you are doing critical work where vignetting at the edge of the field will cause a problem, the 8-inch Schmidt can be equipped with a 160 mm aperture mask to combat vignetting. The mask reduces the overall f/ratio of the camera, but by reducing the corrector plate size, it increases the relative size of the mirror so it is now equal to the diameter of the corrector plus the width of the film holder.


Copyright Notice

I do not clain originality for any of the ideas or techniques described in the document. I also aknowledge that some of this document is material quoted from the contributors listed below. I do, however, claim copyright to the manner in which this material is presented. I grant permission for the information in this article to be freely distributed only for personal or non-profit use.


Contributors who have shared their Schmidt camera experiences with me for this article:

Andreas and Sabine Philipp
Chris Nisbet
David Levy
Dean Ketelsen
Douglas Schmutz
Fernando Paniagua
Jim Bandy
John Mirtle
Kent Kirkley
Keith Shank
Michael Treacy
Richard Payne
Rick Dilsizian
Stefan Beck

References used in preparing this article:

Astrophotography With a Schmidt Telescope
Atlas of Deep Sky Splendors
ATM Book 2
ATM Book 3
Practical Computer-Aided Lens Design
Telescope Optics
The Celestron Schmidt Camera
Wide-Field Astrophotography
Marx & Pfau
Hans Vehrenberg
Albert Ingals, Editor
Gregory Hallock Smith
Rutten & van Venrooij
(owner's manual)
Robert Reeves

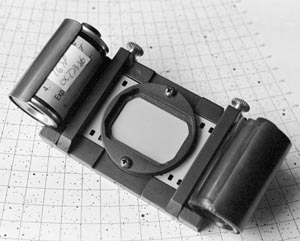
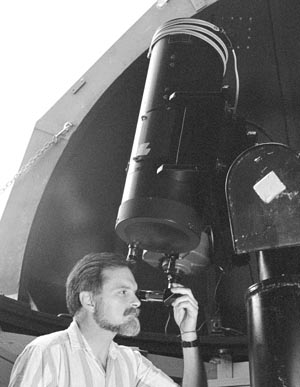
Go to the previous page ---- Common Schmidt Camera Errors
Go to next page-------------A Look at a 14-inch Schmidt Camera